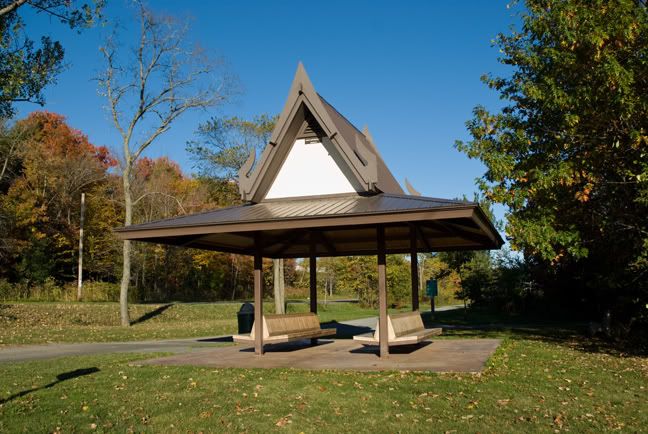
I was asked to photograph this thai shelter so my city could give a gift to a travelling thai delegation. It really is not the best photographic subject so i thought, how could i make it look its best.
I picked early morning to shoot it so the light would be on the shelter and there would be some shadows.
I also bracketed my exposures as i was planning to use hdr to lighten the wood under the roof and darken down the sky and i shot it from every angle possible. I downloaded my photos and made a quick web gallery in photoshop and sent the link to the client. They picked this view and then i got to work.
I had forgotten my tripod so using multiple shots proved difficult in hdr.
I picked the best exposure and opened it by going to file - place so it would come in as a smart object. Now the trick to this is you actually have to open your photo before and do a select all - copy. Then close your image. Now when you create a new document, place, it will be the right size automatically.
After having this open i wanted another smart object layer so i went to layer - smart object - new smart object via copy. This will give you two seperate layers and each is editable in camera raw, independantly of each other.
I double clicked the top layer and changed the camera raw settings for the under side of the roof. I then created a layer mask and painted everything in black except for the underside of the roof.
I then flattened my file so i could retouch. You could also just created a top flattened layer by clicking on shift - control - alt - E. Or something like that.
I used a combination of the healing brush, clone tool, and patch tool to get rid of what i thought were distracting elements.
Like the dead tree, garbage can, sign shadow, just to name a few. I added a curves adjustment layer and a saturation layer.
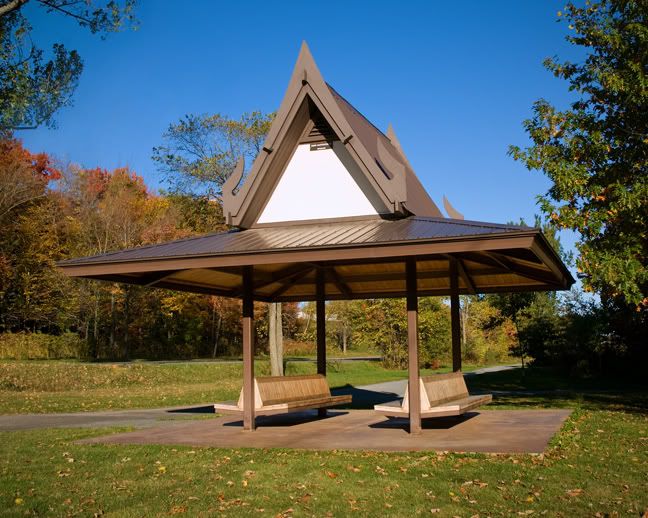
I then did a selection of the tree in the upper left corner and copied and pasted it into place so that corner would not be bare. Next came smart sharpen and lastly i added a vignette by going to filter - distort - lens correction.
Here is the final image.
No comments:
Post a Comment