Friday, August 24, 2007

combining elements

Photo Sharing and Video Hosting at Photobucket
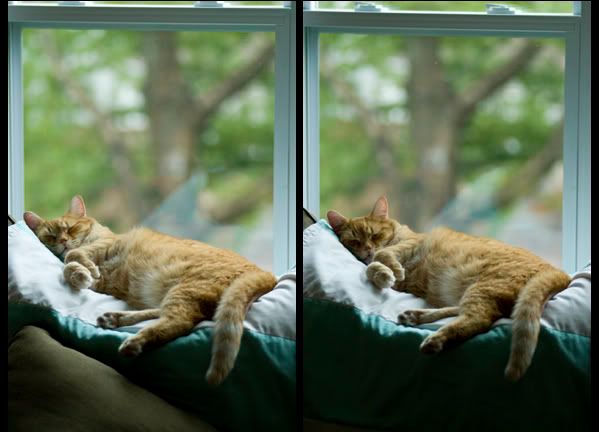
This is just another example of why i love digital photography.
I saw my cat sleeping very comfortably and thought i would grab a shot without disturbing her. After i took about 10 frames i noticed the pillow on the bottom left of the frame and decided that it was distracting. I snuck over, moved the pillow, and took some more shots. But she moved, just a bit, and the light on her face was not as good. No problem, its digital.
I made a selection of the dark part of the image, without the pillow, just using the lasso tool. I hit the refine edge button and feathered my selection by 3. Then holding the shift key (to center the move) i dragged the selected part of that image onto the other image, creating a new layer and covering the pillow. To refine the edge just a bit more and soften it I then made a layer mask on my new layer and painted over the edge of the selection with a large soft brush. Just like erasing the edge of it but the mask allows me some flexibility.
I then got really fussy and decided i wanted the window frame to be more square. I used the transform - skew command and drug the corners a bit till the window looked better. I then sharpened the image, did a bit of healing on some stray hairs and was done.
Here is the final product.
Photo Sharing and Video Hosting at Photobucket

Thursday, August 23, 2007

xray filter

Photo Sharing and Video Hosting at Photobucket
If you have cs3 and have not yet found the xray filter dont feel bad as your not alone. They hid this very well and i feel fortunate to have found the filter that can turn your photos into xrays with the click of a button.
Are you excited, well of course you are , and now i feel bad as i have been pulling your leg. This is actually an xray of my sons hand as he broke his baby finger this week. Can you find the break???
The original image , two put together here, was quite low contrast and really not that sharp. I applied an adjustment curve and tweeked the shadows (darker) and the highlights (lighter) and then applied a smart sharpen to crisp it up.
To get both images into one i created a new window (sized so both would fit) and made the background black. I dragged both images into the new window and moved them around as i wanted them. I then used a layer mask to erase the top layers parts that were blocking out the bones on the underlying layer. I flattened the layers and saved as a jpeg.
This was just a fun post and as i am approaching 1000 page views so far this year i will put the push on to create some informative posts in the near future.

Thursday, August 09, 2007

hard color correction

Photo Sharing and Video Hosting at Photobucket
I was hooking up my slide scanner to a new computer and thought i would try a scan to make sure it was working.
This above image was shot on daylight slide film inside a bar (having breakfast in boston) full of tungsten lights.
I made the scan and saved the file as a tiff.
I then opened it in camera raw (just go to file-open and when the dialogue opens select camera raw as the file type on the bottom left of the box, assuming you have cs3 of course (works with jpg and tiff)) and made some highlight recovery corrections and clarity, vibrance, etc. The temperature and tint however did not help me much in taking out all the red color.
I then opened the image in photoshop and applied an adjustment curve, adding some cyan and green and blue to highlights and shadows. This got me closer but not enough. So now what, how can i correct the image so i can live with it.
I converted the image to black and white using image-adjustments-black and white. Still not happy.
I then brought back some of the color by going under edit-fade and brought the opacity down to 38%.
This was the best i could muster with this one.
I should have just picked a different slide to scan.
Finished result is below.
Photo Sharing and Video Hosting at Photobucket